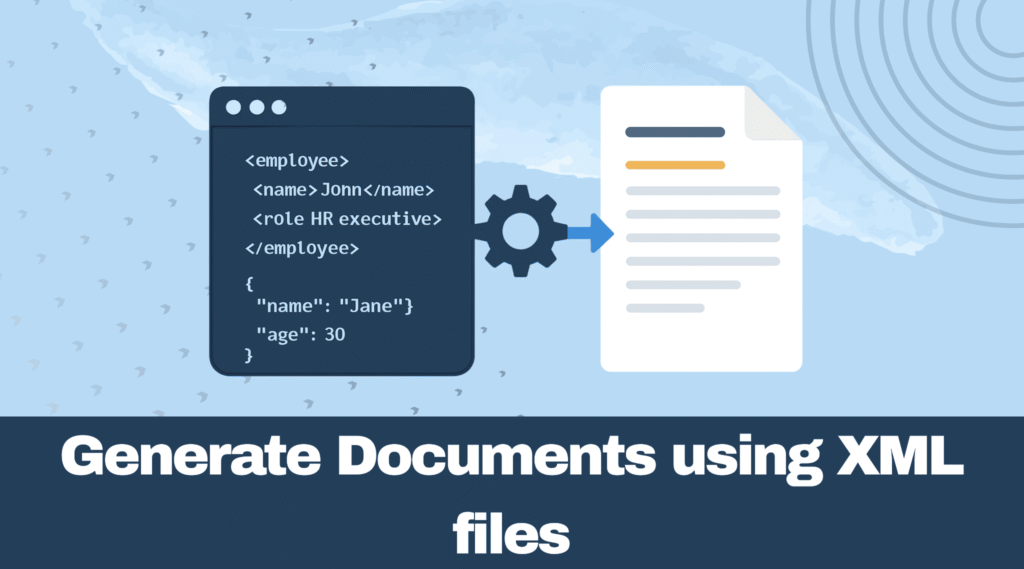
How to Generate Documents with XML Files?
What is XML?
XML Files are Extensible Markup Language (XML) files, which are used for storing and transporting data in a structured and readable format. You can also exchange the data between systems, platforms, or programs.
Advantages of XML:
Well, let’s discuss a few advantages of XML so that you know “WHY XML”. Firstly, it describes data precisely, allowing custom tags. Most importantly, it supports both human and machine readability, as well as internationalization.
Due to its flexibility and structure, XML can be applied to a wide range of real-world situations. These are the various ways to generate documents using XML instance documents.
Key Takeaways:
● Learn how to create XML instance documents step-by-step using tools like XML Notepad and Oxygen XML Editor.
● Understand how to automate document generation from XML data using Python and Java.
● Explore the advantages of XML by comparing it with other software for creating structured, portable, and platform-independent documents.
● Gain a balanced perspective on the benefits and limitations of utilizing XML for document generation.
Creating XML Instance Documents:
XML Editors/IDEs: XML Notepad and Oxygen XML Editor are two tools that aid in creating XML documents with a structured interface, validation, and auto-complete.
Step-by-step process on how to create a document using XML Notepad:
1. Launch XML Notepad:
● Go to Start -> click Programs -> XML Notepad -> Microsoft XML Notepad.
● The interface displays a dual-pane structure on the left and values on the right.
2. Rename the root element:
● “Root_Element” is the default node. After selecting it by clicking on it, type a new name (Catalogue, for example).
● Press Enter to accept the new name.
3. Add a child element:
● Select ‘insert’ -> ‘child element’, on the right click root element.
● Give a name (eg, book)
4.Insert an attribute:
● Right-click the new child node, select ‘insert’ -> ‘attribute’.
● Type the attribute name (eg, ID)
● Mark ID, and the values pane, enter the corresponding value (eg, bk101).
5. Insert child elements under the book:
● Right-click the book, select ‘insert’ -> ‘child element’.
● Name it (eg, author), select the element, and type its value in the values pane.
● Repeat to add elements like title, genre, etc, entering their values.
6. Duplicate elements (if needed):
● To create copies for new entries, right-click on an existing Book element, choose “Duplicate,” and then enter the relevant information.
7. Add text nodes:
● To add text to an element, select the node and then select “Insert” → “Text” from the menu. Put the desired text content here.
8. Insert comments:
● To add notes or documentation within the XML structure, highlight a node and then select “Insert” → “Comment.”
9. Change element types (if needed):
● After choosing the node, select the relevant type by going to Tools → Change To.
● You cannot change the root node or nodes with children.
10. View raw XML source:
● To view the actual XML markup produced by your tree edits, select “Source” from the “View” menu.
11. Validate your XML:
● As you work, the status bar will show whether your XML is well-formed.
● If XSD is available, use the built-in validator for schema validation.
12. Save the document:
● Go to File → Save, enter a filename, and click Save.
● Then save the file as an XML document, ready to transport.
Step-by-step process on how to create a document using XML Oxygen XML Editor:
1. Open the Oxygen XML Editor:
● On your computer, launch the Oxygen XML Editor application.
● Your editing workspace will be shown in the main window.
2. Make a fresh document:
● Either select File → New or click the “New” button on the toolbar.
● A range of file types and templates will be displayed when the “New” document wizard opens.
3. Select the type of document:
● Choose “XML Document” as your file type in the wizard.
● You have the option to swiftly find “XML Document” by using the wizard’s search bar.
● To open a new, blank XML file in the editor, click “Create.”
4. Modify the root element:
● A default root element (usually <root> or something similar) is inserted by Oxygen.
● To rename, click on the root element in the editor area, type a new name (Catalogue, for example), and hit Enter.
5.Include a child element:
● Move the pointer inside the root element.
● In Author mode, press Enter and choose from the list of permitted elements, or right-click and choose “Insert” → “Element.”
● Give your new element a name (book, for example) and make sure
6. Add a property:
● The new child element (book) can be clicked.
● To add an attribute, click “+” in the Attributes panel, which is often displayed above or next to it.
● Enter the name of the attribute (ID, for example) and its value (bk101, for example).
7. Place the child elements beneath the book:
● Move the pointer inside the book element.
● Press Enter in Author mode or use right-click → “Insert” → “Element.”
● Choose each new element, enter its value, and give it a name (author, title, genre, etc.).
8. Duplicate elements (if needed):
● To create copies (e.g., new book entries), select an existing book element, right-click, and choose “Copy”, then “Paste” as needed. Update each new element’s content.
9. Include text nodes:
● After positioning your cursor in the desired element, type the text directly.
● Just click into the element and type in Author mode.
10. Add a comment:
● Place the cursor in the desired comment location.
● Choose “Insert” → “Comment” with a right-click. Type your message.
11. Modify element types as necessary:
● To change the node’s tag, pick it, then right-click and choose “Change Type” (if it’s an option).
● This might not be possible with certain nodes (such as the root or those that have children).
12. View the source XML:
● Using the View menu or the buttons at the bottom, select “Text” mode to view the raw XML.
13. Verify your XML:
● In most cases, validation happens automatically, as indicated by markers; if not, use Tools → Validate or click the “Validate” (checkmark) button.
● In the document properties, associate your XML file with an XSD if you wish to validate against a schema.
14. Save your document:
● Go to File → Save, enter a filename, and click Save.
● Also, ensure your file has the .XML extension before saving.
Programmatic Generation: Programming languages like Python and Java are used with XML libraries to generate the documents.
Not familiar with document creation or Python? Start with our easy-to-follow tutorial on using Python to create Word documents. Click here.
Are you curious about the top resources for making dynamic PDFs? See our list of the best PDF creators for documents with a lot of data. Click here.
How to create or generate documents (Word or PDF) using data from XML files using Python
Step 1: Recognise the Objective
The goal is to convert organised text data from an XML file into a readable Word or PDF document. Libraries that can read XML and then write Word or PDF files enable this in Python.
Step 2: Set up your environment:
Install Python if you don’t have it; you have to download it from python.org and install it.
Then, open the command prompt or terminal, and you have to install all the necessary Python libraries by running the code
● python-docx, which helps create Word documents.
● FPDF helps create PDF files.
● XML.etree.ElementTree is a built-in library for reading XML files.
Step 3: Comprehend your XML file:
XML files store data in tags. For example:
<Library>
<Book>
<Title>Python for Beginners</Title>
<Author>John Smith</Author>
</Book>
<Book>
<Title>Learning XML</Title>
<Author>Jane Doe</Author>
</Book>
</Library>
After reading this data, you will convert it to Word or PDF content.
Step 4: Use Python to read and parse the XML file.
Python can open the XML file and read its contents easily:
Import XML.etree.ElementTree as ET
tree = ET.parse(‘library.XML’) # Load your XML file
root = tree.getroot() # Get the root element
Step 5: Create a Word document from XML data
Here’s how to use the python-docx library to create a Word document from your XML content:
From docx import Document
doc = Document()
doc.add_heading(‘Library Book List’, level=1)
# Loop through each book in the XML
for the book in the root.findall(‘Book’):
title = book.find(‘Title’).text
author = book.find(‘Author’).text
doc.add_paragraph(f’Title: {title}’)
doc.add_paragraph(f’Author: {author}’)
doc.add_paragraph(”) # Blank line for spacing
doc.save(‘library.docx’)
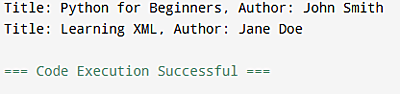
Your book list will be nicely formatted in a Word document called library.docx.
Step 6: Create a PDF document from XML data
Using the fpdf library, you can write the same data into a PDF file:
From fpdf import FPDF
pdf = FPDF()
pdf.add_page()
pdf.set_font(“Arial”, size=12)
pdf.cell(200, 10, txt=”Library Book List”, ln=True, align=’C’)
for book in root.findall(‘Book’):
title = book.find(‘Title’).text
author = book.find(‘Author’).text
pdf.cell(200, 10, txt=f”Title: {title}”, ln=True)
pdf.cell(200, 10, txt=f”Author: {author}”, ln=True)
pdf.cell(200, 10, txt=””, ln=True) # Blank line
pdf.output(“library.pdf”)
This creates a PDF file named library.pdf.
Step 7: Execute your script
Save your Python script (eg, generate_docs.py).
Make sure your XML file is in the same folder
In your command prompt, type python generate_docs.py to launch the script.
Step 8: Examine and open the output documents
In Microsoft Word, open the library.docx.
Open the library.pdf in any PDF reader.
The information you took out of the XML file is in both files, and it is presented in a readable format.
Complete Python code:
Import XML.etree.ElementTree as ET
from docx import Document
from fpdf import FPDF
# Step 1: Load and parse your XML file
tree = ET.parse(‘library.XML’)
root = tree.getroot()
# Step 2: Create a Word document from XML data
doc = Document()
doc.add_heading(‘Library Book List’, level=1)
for book in root.findall(‘Book’):
title = book.find(‘Title’).text
author = book.find(‘Author’).text
doc.add_paragraph(f’Title: {title}’)
doc.add_paragraph(f’Author: {author}’)
doc.add_paragraph(”) # Blank line for spacing
doc.save(‘library.docx’)
# Step 3: Create a PDF document from XML data
pdf = FPDF()
pdf.add_page()
pdf.set_font(“Arial”, size=12)
pdf.cell(200, 10, txt=”Library Book List”, ln=True, align=’C’)
for book in root.findall(‘Book’):
title = book.find(‘Title’).text
author = book.find(‘Author’).text
pdf.cell(200, 10, txt=f”Title: {title}”, ln=True)
pdf.cell(200, 10, txt=f”Author: {author}”, ln=True)
pdf.cell(200, 10, txt=””, ln=True) # Blank line for spacing
pdf.output(“library.pdf”)
print(“Documents generated successfully: library.docx and library.pdf”)
Output:

Tips and tricks:
1. Store the XML input file in a folder. Use straightforward file and folder names (no special characters or spaces).
2. Include File Paths in the Code. Use raw strings or full paths with forward slashes.
3. Install libraries using pip. Run from a terminal or command prompt. If at all possible, use a virtual environment.
4. Run the code.
See our comprehensive guide on creating bulk Word documents with Python if you want to create numerous Word documents quickly. Click here.
Do you want to programmatically create PDFs? Check out our detailed tutorial on using Python to create PDF documents. Click here.
How to Create or Generate Documents (Word or PDF) Using data from XML files using Java.
Step 1: Recognise the Objective
You wish to use the Java programming language to create readable Word or PDF documents by reading data from an XML file, which contains information in a structured format.
Step 2: Set up your Java environment
Install Java Development Kit from Oracle’s website.
Install an integrated development environment like IntelliJ IDEA or Eclipse to write and run your Java code.
To create Word and PDF documents, you will require external libraries like:
- Apache POI for Word documents.
- iText or Apache PDFBox for PDF creation.
Step 3: Comprehend your XML file:
Suppose your XML file library.XML looks like this:
<Library>
<Book>
<Title>Java for Beginners</Title>
<Author>Joe Smith</Author>
</Book>
<Book>
<Title>Learning XML</Title>
<Author>Jane Doe</Author>
</Book>
</Library>
Step 4: Add Required Libraries to Your Project
Add the following dependencies for iText and Apache POI to your pom.xml file if you’re using Maven:
<!– Apache POI for Word –>
<dependency>
<groupId>org.apache.poi</groupId>
<artifactId>poi-ooXML</artifactId>
<version>5.2.3</version>
</dependency>
<!– iText for PDF –>
<dependency>
<groupId>com.itextpdf</groupId>
<artifactId>itext7-core</artifactId>
<version>7.2.5</version>
</dependency>
Step 5: Use Java to read the XML file
To read and parse the XML file, use Java’s built-in XML parser (javax.XML.parsers):
Import javax.XML.parsers.DocumentBuilderFactory;
import javax.XML.parsers.DocumentBuilder;
import org.w3c.dom.Document;
import org.w3c.dom.NodeList;
import org.w3c.dom.Element;
import java.io.File;
File inputFile = new File(“library.XML”);
DocumentBuilderFactory dbFactory = DocumentBuilderFactory.newInstance();
DocumentBuilder dBuilder = dbFactory.newDocumentBuilder();
Document doc = dBuilder.parse(inputFile);
doc.getDocumentElement().normalize();
NodeList nList = doc.getElementsByTagName(“Book”);
for (int temp = 0; temp < nList.getLength(); temp++) {
Element book = (Element) nList.item(temp);
String title = book.getElementsByTagName(“Title”).item(0).getTextContent();
String author = book.getElementsByTagName(“Author”).item(0).getTextContent();
// Use title and author
}
Step 6: Generate a Word Document Using Apache POI, Generate a Word Document Using Apache POI
Import org.apache.poi.xwpf.usermodel.XWPFDocument;
import org.apache.poi.xwpf.usermodel.XWPFParagraph;
import java.io.FileOutputStream;
XWPFDocument document = new XWPFDocument();
XWPFParagraph title = document.createParagraph();
title.createRun().setText(“Library Book List”)
for (int i = 0; i < nList.getLength(); i++) {
Element book = (Element) nList.item(i);
String bookTitle = book.getElementsByTagName(“Title”).item(0).getTextContent();
String bookAuthor = book.getElementsByTagName(“Author”).item(0).getTextContent();
XWPFParagraph p = document.createParagraph();
p.createRun().setText(“Title: ” + bookTitle);
p = document.createParagraph();
p.createRun().setText(“Author: ” + bookAuthor);
p = document.createParagraph();
p.createRun().setText(“”);
}
FileOutputStream out = new FileOutputStream(“library.docx”);
FileOutputStream out = new FileOutputStream(“library.docx”);
document.write(out);
out.close();
document.close();
Step 7: Generate a PDF Document Using iText
Here’s an example for creating a PDF with the same data:
import com.itextpdf.kernel.pdf.PdfWriter;
import com.itextpdf.kernel.pdf.PdfDocument;
import com.itextpdf.layout.Document;
import com.itextpdf.layout.element.Paragraph;
PdfWriter writer = new PdfWriter(“library.pdf”);
PdfDocument pdf = new PdfDocument(writer);
Document document = new Document(pdf);
document.add(new Paragraph(“Library Book List”));
for (int i = 0; i < nList.getLength(); i++) {
Element book = (Element) nList.item(i);
String bookTitle = book.getElementsByTagName(“Title”).item(0).getTextContent();
String bookAuthor = book.getElementsByTagName(“Author”).item(0).getTextContent();
document.add(new Paragraph(“Title: ” + bookTitle));
document.add(new Paragraph(“Author: ” + bookAuthor));
document.add(new Paragraph(” “));
}
document.close();
Step 8: Get Your Java Code Compiled and Run
Make sure your project folder contains a library. XML.
Launch the Java application, and your Books data will be created into library.docx and library.pdf files.
import javax.XML.parsers.DocumentBuilderFactory;
import javax.XML.parsers.DocumentBuilder;
import org.w3c.dom.Document;
import org.w3c.dom.NodeList;
import org.w3c.dom.Element;
import java.io.File;
import java.io.FileOutputStream;
// Apache POI imports for Word
import org.apache.poi.xwpf.usermodel.XWPFDocument;
import org.apache.poi.xwpf.usermodel.XWPFParagraph;
// iText imports for PDF
import com.itextpdf.kernel.pdf.PdfWriter;
import com.itextpdf.kernel.pdf.PdfDocument;
import com.itextpdf.layout.Document;
import com.itextpdf.layout.element.Paragraph;
public class XMLToDocs {
public static void main(String[] args) {
try {
// Step 1: Parse the XML file
File inputFile = new File(“library.XML”);
DocumentBuilderFactory dbFactory = DocumentBuilderFactory.newInstance();
DocumentBuilder dBuilder = dbFactory.newDocumentBuilder();
Document XMLDoc = dBuilder.parse(inputFile);
XMLDoc.getDocumentElement().normalize();
NodeList nList = XMLDoc.getElementsByTagName(“Book”);
// Step 2: Create a Word document
XWPFDocument wordDoc = new XWPFDocument();
XWPFParagraph header = wordDoc.createParagraph();
header.createRun().setText(“Library Book List”);
for (int i = 0; i < nList.getLength(); i++) {
Element book = (Element) nList.item(i);
String title = book.getElementsByTagName(“Title”).item(0).getTextContent();
String author = book.getElementsByTagName(“Author”).item(0).getTextContent();
XWPFParagraph paraTitle = wordDoc.createParagraph();
paraTitle.createRun().setText(“Title: ” + title);
XWPFParagraph paraAuthor = wordDoc.createParagraph();
paraAuthor.createRun().setText(“Author: ” + author);
wordDoc.createParagraph().createRun().setText(“”); // blank line
}
FileOutputStream outWord = new FileOutputStream(“library.docx”);
wordDoc.write(outWord);
outWord.close();
wordDoc.close();
System. out.println(“Word document created successfully!”);
// Step 3: Create a PDF document
PdfWriter writer = new PdfWriter(“library.pdf”);
PdfDocument pdfDoc = new PdfDocument(writer);
Document pdf = new Document(pdfDoc)
pdf.add(new Paragraph(“Library Book List”));
for (int i = 0; i < nList.getLength(); i++) {
Element book = (Element) nList.item(i);
String title = book.getElementsByTagName(“Title”).item(0).getTextContent();
String author = book.getElementsByTagName(“Author”).item(0).getTextContent();
pdf.add(new Paragraph(“Title: ” + title));
pdf.add(new Paragraph(“Author: ” + author));
pdf.add(new Paragraph(” “)); // blank line
}
pdf.close();
System.out.println(“PDF document created successfully!”);
} catch (Exception e) {
e.printStackTrace();
}
}
}
Output:
Tips and tricks:
- Keep XML files with simple names (no spaces or special characters) in a clean folder, such as resources/XML/.
- For cross-platform access, use resource-based or absolute file paths with forward slashes.
- For simple dependency management, add libraries (such as iText, Apache POI, and JAXB) using Maven/Gradle.
- Make sure paths are resolved correctly when running Java code in an IDE or terminal.
- During development, use System.out.println() to monitor or debug.
Document automation software: these platforms provide more advanced features for generating a complex document that contains conditional logic, repeating sections of dynamic content, which is based on the XML datasource.
How To Generate Documents Using Docupilot:
Step 1: Create an account and log in.
Create an account on the Docupilot website, or sign in if you already have one.
Step 2: Creation of template:
● Create a document template. You can use a built-in editor, then upload a Microsoft Word document, or import a fillable PDF.
● Put placeholders where you want data to be dynamically inserted, such as {{client_name}} and {{invoice_amount}}. For customisation, Docupilot allows variables, dynamic tables, loops, and conditionals.
Step 3: Insert logic:
● Use variables as placeholders for any data (customer names, dates, etc.)
● To extract repeatable data, such as line items in an invoice, use dynamic tables.
● To regulate which sections show up, add conditionals (e.g., include special terms if certain conditions are met).
● The Loops option helps when you need to repeat sections, like listing multiple items in an invoice.
Step 4: Combine your data source:
● Link your data source to Docupilot. Google Forms, Excel, CSV, CRM, APIs, Zapier, cloud storage, and other databases are among the integrations that are supported.
● The template placeholders will be automatically filled with data from these sources.
Step 5: Generate documents:
● Use a software dashboard to pin your template and data source.
● Select if you want to generate in bulk or single documents.
● Do the document generation manually, via an API, or set up automated workflows.
Step 6: Analyze and save or publish:
● View generated documents in XLSX, PDF, DOCX, and PPTX formats.
● Auto-generate the documents to email, cloud storage, e-signature platforms, or any third-party apps.
Step 7: Configure and Upgrade:
● Create automated processes to generate repetitive documents, such as contracts or monthly invoices.
● To maintain uniformity and professionalism, update templates as necessary and repurpose them for new documents.
How To Generate Documents Using Windward Studios:
Step 1: Create an account and log in.
Create an account on the Docupilot website, or sign in if you already have one. This will integrate with Microsoft Word, PowerPoint, or Excel, which will allow you to create templates using familiar tools.
Step 2: Create or open a template:
- Open Microsoft Word (or PowerPoint/Excel, based on the target document).
- Access the Windward tabs added to your Office ribbon after installation.
- Use a template from Windward’s library, your files, or linked databases, or begin with a blank document.
Step 3: Insert tags and business logic:
- Wherever you want dynamic data (like customer names or dates) to appear, add placeholders using the Windward tagging language. To make this easier, there is a Tag Wizard.
- Define variables, conditionals for sections that should only show under specific circumstances, and loops for repeatable data (such as invoice items).
- To save time and effort, drag and drop fields from an existing template or your data source to use as sub-templates.
- Use all of Word’s built-in formatting tools to style tables and content.
Step 4: Link to Data Sources:
- To link your template to XML, JSON, SQL, or other compatible data formats, use the Windward Designer.
- Assign the appropriate fields in your data source to the tags you added.
- You can use query tags for intelligent, data-driven documents or define runtime parameters for more complex customisation.
Step 5: Generate Output Documents
- To make sure the data population is correct, preview your template in real time.
- Select your desired output format, like PDF, HTML, and others
- Output settings should be selected.(eg.file destination, email)
- Depending on your requirements, create documents for a single dataset or in bulk (batch processing).
Step 6: Manage permission and template category:
Limit the ability to edit templates as necessary, and keep them in your library for later use to ensure consistency and reusability.
How To Generate Documents Using Perfect Doc Studio:
Step 1: Create a Template and Assign Variables:
Step 2: generating documents (two ways):
Option A: Generate Through Transactions (for more than 10 documents)
- Assign the necessary variables or placeholders that will eventually be swapped out for real data.
- Access the Main Menu → Transactions → Create a PDF.
- A list of available templates will appear; pick the one you like.
- Click Sample Format → choose XML in the upper right corner.
- It will automatically download an XML file.
- To proceed with additional processing, open this XML file and copy and paste the data into Notepad or any other code editor.
Option B: Preview and Download (for less than 10 documents)
Assign the necessary variables or placeholders that will eventually be swapped out for real data.
Select “Preview” and “Download.”
Choose “Download Document” and then “Download Request Sample.” Choose XML.
You will download an XML file.
Copy and paste the data into Notepad or a code editor after opening the XML file.
Step 3: Generate bulk documents:
- Add Document Files:
- Choose which document files you want to create.
- Start the Generation Process:
- Press the “Generate” button.
- Finalisation:
- The files will be processed by the system, which will produce the relevant documents in large quantities.
Customization:
XML is extensible; users can extend their markup symbols. Users can create an infinite number of symbols to describe their content with XML, giving them total control.
Since we saw what XML is, why choose XML? Let’s compare XML with other languages (HTML).
Curious about how dynamic document generation is evolving? Learn the top methods to automate and personalize documents in 2025. Click here
How XML Compares to HTML:
| Features | XML | Html |
|---|---|---|
| Main use | Stores and supports data | Displays data |
| Syntax | Strict rules | More lenient |
| Custom tags | Allowed custom tags | Predefined tags only |
| Island Trading | Helen Bennett | UK |
| Focus | Describes and structures data | Focuses on data presentation |
| Closing tags | Required closing tags | Its optional |
Although XML has many advantages, such as structure, adaptability, and broad compatibility, it also has disadvantages, just like any other technology.
Let’s examine some of the main drawbacks of XML use.
Disadvantages of XML:
- Hard to read: Many opening and closing tags, such as <name>John</name>, are used in XML, which can make files lengthy and more difficult to read or write.
- Slower to process: the size and nature are slower to process compared to other HTML.
- Strict Syntax: This is self-explanatory; it has strict syntax and cannot make an error.
- Complex: it’s more complex to work with when working with parsers than other languages.
- Simple data: not ideal for simple data. XML is overkill; there are better choices like JSON, YAML, or even CSV.
Even though XML has certain drawbacks, its structured format nevertheless makes it an effective tool for creating documents. Effective use of XML in practical applications requires an understanding of how to create XML documents.
Perfect Doc Studio’s XML document editing is ideal for non-technical users, simply because of how easy it is to use it. Don’t know programming languages or aren’t familiar with other tools? Try Perfect doc Studio for free! It provides a low/no-code solution that supports output to Word, HTML, and PDF formats, and includes data binding capabilities. By building on an easy-to-use interface, it adds more power and flexibility, making it a good choice for non-developers managing organised documents.
Conclusion:
One of the most effective ways to automate data sharing, documentation, and reporting is to use Java to convert XML data into formatted documents like Word or PDF. Developers can produce dynamic, adaptable outputs that meet a range of business requirements by integrating XML parsing with templating engines and libraries such as Apache POI or iText. Strong structure and compatibility are provided by XML, but effective, maintainable, and scalable document generation is ensured by selecting the appropriate tools and workflow.
FAQs
Parsing the XML using JAXB to turn it into Java objects is the most effective method for converting XML data into a formatted document in Java, such as Word or PDF. The parsed data can then be inserted into structured paragraphs, tables, or styled layouts to create Word documents using Apache POI or iText to create PDF files. For more complex formatting, you can also use XSLT to convert XML to HTML, and then use programs like Flying Saucer or iText’s HTML converter to turn the HTML into PDF.
In Oxygen XML Editor, it is possible to automate the creation of documents from XML files. The main way that Oxygen facilitates automation is by offering configurable transformation scenarios that can be set up to transform XML into different formatted outputs, such as Word, HTML, PDF, and so forth. Scripting in your environment can initiate these transformation processes, or they can run automatically.
XSLT can be used to convert XML data into a desired output format, which can subsequently be converted into Word or PDF. This allows you to link an XML file to a template for dynamic content generation in Java. As an alternative, use templating engines such as Freemarker or Thymeleaf, which parse XML into Java objects and use those objects to dynamically fill predefined templates. These engines are perfect for creating formatted documents, emails, and reports.

How Legacy Document Tools Crash Salesforce During Insurance Claims (And the 1-Call Fix)
When a storm hits, insurance claims explode, but so can your CRM if legacy document tools burn throu

Top-Rated P&C Insurance Software for SMB And Enterprises
Understand the P&C insurance landscape and explore key functionalities and leading software options

Explore the Best Insurance Analytics Software in 2025
Evolving customer expectations and increasing competition have made Insurance Analytics Software a v